Showing posts with label Doom2. Show all posts

Sunday, February 11, 2018

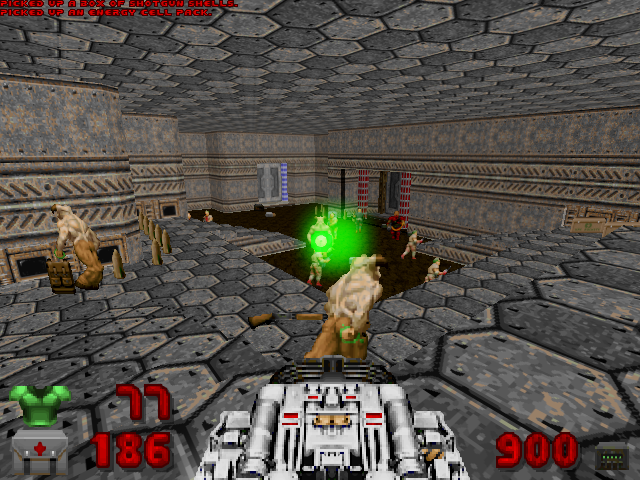
New Doom 2 mod "Improved Doom" being worked on by me....

Tonight I spent about 2-3 hours doing some mod work for Doom 2.  I've been working on a mod for Doom 2 called improved doom for a long time.... Built from the ashes of a previous Mod by me that was a complete failure, improved doom is mostly a rebalancing mod, designed to be played in super hard maps, ones that throw in huge hordes of difficult enemies...

It is also a monster/enemy replacer mod that randomly replaces enemies and guns with new ones, similar to AEOD, but with the emphasis of Doom friendly ones being used only. That's right, no enemies from other games, only weapons and guns that fit doom well are used in this mod.

I've seen a lot of Randomizer mods and one thing that always bugged me about them is that they always made doom harder, not easier.  Look at mods like Complex Doom, HXRTC, etc... All of them make you take way too much damage.. So for me playing stuff like Alien Vendetta in them is not possible, being a subpar doom player....

I needed something to rebalance the game, add new enemies and weapons and also add in RPG elements as well... Doom RPG+RLA do this but they are again too difficult (especially at higher levels when you take more damage from enemies than at lower levels). I wanted something with similar features to Doom RPG+RLA/HXRTC but balanced for people who aren't great at the game so that They can survive harder mapsets without dying 5-10+ times per level in tough maps that throw hordes of revenants, arachnotrons, hell knights and barons and archviles at the player.

To Rebalance the game, Improved Doom makes a lot of big changes to the game, not limited to:

-Rebalanced Skill levels. No longer do you have a skill setting that encompasses a specific enemy damage factor and enemy count. Enemy counts in skill settings are choseable seperate from the enemy damage. You have the following skill settings due to this:

Easy Enemy Count, Low Damage
Medium Enemy Count, Low Damage
Hard Enemy Count, Low Damage
Easy Enemy Count, Medium Damage
Hard Enemy Count, Medium Damage
Easy Enemy Count, High Damage
Hard Enemy Count, High Damage

-The enemy damage factors for the skill settings are reduced to make it bearable in tough maps.
The first 3 difficulties are pathetically easy and you take only 10% damage. Medium makes you take 30% damage and hard makes you take 50% damage.

-A built in upgrade system allows you to upgrade character abilities at any time, it only requires that you have money (given when you level up - that's right there are levelups like in RPG games in this). You can upgrade your characters Movement Speed (which starts slow), Damage Resistance (which can start low or high, see above), Max Health and Armor. Each upgrade costs a certain amount of money. I found that once I upgraded my players Damage Resistance a lot, even cyberdemons could not easily kill me. This makes the game Potentially way easier but it depends on how you use your upgrades... If you don't put a single point into damage resistance upgrades it will be a challenge, much more difficult than doom in that reguard. But if you put tons of Damage Resistance upgrades onto your player, you will be an absolute god of doom.

-Cyborg Powers... If the last feature didn't make you think this will be piss easy, than this will..

You get cyborg powers as you level up not limited to:

-Cybernetic Movement Boost : Makes you move faster
-Cybernetic Shield : Makes you invulnerable for 30 seconds, by erecting a forcefield around you...
-Cybernetic Healing : Allows you to heal yourself without  the need of medkits. Upgrades for this
can make  this a full heal ability later.
-Cybernetic Flight : Allows you to fly around
-Cybernetic Health Regen : Allows you to slowly regen your health...
-Cybernetic Weapon firerate Increase : Doubles the firerate of all weapons.
-Cybernetic Weapon Damage Increase : Makes you do 4 times as much damage
-Cybernetic Time Freeze : Freezes time for 10 seconds.

You can select which power to use with defined keys in the commands section and use another defined key to use that selected power. Downside is that there is a 30-60 second cooldown period for all powers so you can't use them like crazy. But careful, strategic use of forcefield, damage increase or firerate increase can make maps easier.

-Enemies have less health than mormal. On Easy difficulties (first 4 skill settings), they have 50% heath and on medium skills (next 2 skills) they have 75% of their normal health, and on hard they have 90% of their normal health.

-Insanely overpowered guns...
All of your default weapons are insanely suped up. All shotguns minus the new quadshotgun are semi-automatic now, chaingun is a killing machine, rocket launcher fires way faster, so does the BFG and the plasma does a lot more damage than it used to. Add really overpowered custom weapons to that and you get a kickass arsenal.

Improved doom does random spawning well and it uses a lot of new enemies and guns found on the beastiary but another thing it adds are enemies not found on the beastiary such as Doom 64 enemies and custom ones that are from old megawads dehacked patches but converted to Decorate or custom ones made by me to be difficult.

The mod is mostly finished. I am doing some long term testing in slaughterwads to see if it is bearable for me. Starting with Alien Vendetta. So far I've gotten through maps01-03 of it and died only 2 times thanks to low damage resistance on map01. Maps02-03 I died not once and that was due to me putting tons of points into damage resistance.

Screenshots:


A release for this mod is planned later on next month.....

Stay tuned...

Saturday, November 18, 2017

Masochistic Death Doom 2 megawad trilogy Remade....

Last December and earlier this year, I constructed the Masochistic Death Doom 2 Megawad trilogy : A set of 3 modified randomly generated Doom 2 megawads that were tributes to 3 megawads I made by hand that I no longer have on my computer due to A) People trashing the first one in youtube videos and twitch streams and B) Me deleting them in a fit of guilt.

Masochistic Death 1 was originally made last december. It was a tribute to my second made megawad (the one that got trashed). It came out ok. I used a tweaked oblige 7.37 to make it, then retextured it. The original wad was a tribute to my 3 favorite doom megawads, and so was this. Masochostic Death 1 came out ok... Some levels were good, some were not.

I made part 2 and 3, tributes to the sequels of that failed megawad (Torture and Insane doom), earlier this year. They were both INSANELY hard, so hard that I had to scrap them... I didn't want them to be THIS Hard... Level 1 of the second one for instance had you fight a partially invisible super fast archvile in the first room with nothing but an automatic shotgun. It was too hard.... And since the first part was too badly done I decided to remake the trilogy recently.

I put together masochistic death 2.0 5 days ago, using a tweaked version of oblige 7.70, that was tweaked to change textures to make them look better mostly.  It came out a lot better than expected. maps 1-12 were easy, like the original failed megawad, but once I did map13-20 I amped up the difficulty greatly, making them hell revealed difficulty. By the time Map21-30 came the difficulty became totally insane for the end of the wad, starting to put in tons of archviles.

I made sure I retextured the levels in Masochistic Death 2.0 with the same textures the failed megawad had... That was important. CageTextures for Episode 1, EternalDoom/Retres for Episode 2 and Epsode 3 had textures from a tweaked oblige I found on the Oblige Forums...

That difficulty would be dwarfed by masochistic death 2 and 3, which I remade last night... I used the same oblige 7.70 version I used to make Masochistic death 2.0.  This time I amped up the difficulty to rediculous extents. The first map of each was easy but anything beyond that.... hardly.. Maps 2-11 of masochistic Death 2 were hard as hell, with tons of arch viles in map 2 especially. masochistic Death 3 had 50+ archviles per level in maps 2-11! By the time map12-20 came, the difficulty would be increased even more, to have shit tons of hard enemies, and masochistic Death 3 had tons of cyberdemons too in these maps. Episode 3 was insane in both wads... I made sure Masochistic Death 3 would have the most insane finale possible, so I made sure all monsters in monster control were set to INSANE!

Masochistic Death 2 had different textures than the original torture.wad. Instead of IKbase, then Fear Textures then CageTextures, It had NMNCorp textures for episode 1, Modded Oblige textures (mentioned above) for Episode2, and CageTextures For Episode3. Masochistic Death 3 Had CageTextures in Episode 1, Just Like Insane Doom, But had different textures for episode 2 and 3, the original had tons of new textures for episode 2 and 3, this remake used Doom64 textures for episode 2 and modded oblige textures for episode 3.

Overall I think these came out great. Whether I release these levels or the hell revealed pack ones is up in the air now. I will let you know about that later, maybe around November 31'st or so...

Screenshots:

Masochistic Death 2.0


Masochistic Death 2


Masochistic Death 3


Over the next few Days I will be testing these wads in DoomRPG and DoomRLA, my favorite mods to test such wads in, due to how easy they make wads like this. I already have half of Masochistic death 2.0 tested, I will get up to map20 tonight.... Then I start Masochistic Death 2 and 3 testing after that...


Friday, November 17, 2017

Masochistic Death Doom2 Mapset Maps 1-12 completed with ZERO DEATHS! That's right people! ZERO DEATHS!

So I decided to do another playthrough today. I chose Masochistic Death, a Modified Randomly Generated mapset to play. It was designed to be a tribute to a wad that everyone in the damn community trashed that I made. It had a similar texture theme in episode 1 and 2, similar gameplay, but this time the randomly generated maps made it much better looking than the original wad It is a tribute to..

So I decided to play maps 1-12 in a playthrough on youtube. I got up and no one was home so I jumped all over the chance to do maps 1-12. Pretty good run I had. As usual I was playing it in the mods DoomRPG and DoomRLA, which are RPG mods for Doom 2. I built a pretty damn strong character in it, a demolitionist with a lot of Vitality, Strength and Defense.  I had leveled him up to level 29 or so by map12 which is quite good. Spent lots of skill points to get skills I needed. Got good armor and a good arsenal of powerful weapons, some assemblies, some not, to help me clear the levels.

Maps 1-4 were easy. I had absolutely no issues with them. By map 4 all I had for weapons were a super shotgun, Tactical rocket launcher, and a Starting Mirv Launcher I decided to save for later. By the time I got to map 5 however, the maps got way harder. I got a thompson, and it saved my rear end in map05, when I had to fight 15 revenants in one room, Twice. I got a BFG soon after and in one hilarious member, I ran into a narrow hallway filled with enemies to BFG a nightmare Archvile that was behid them, that had  to be killed Right then. I ran out and took very little damage, which was great. Then I got to map06-07 and they were harder than map01-04 but much easier than map05.  I survived them only to stumble into map08, 09 and 10. The first of these was no harder than map07.  09 and 10 were much tougher though..

Map09 had lots of hard enemies in it. I survived it because I used the MIRV Launcher I had saved up a lot. By  this point I also had a High Powered plasma gun I assembled and a good Auto Shotgun as well. That all helped a ton on map10, which was the toughest map I played on the run, overall.  I ran into tons of barons of nightmares in map10, because I was doing a mission to kill 6 of them to get a weapon in DoomRPG. But the real challenge when I had to fight a cyberdemon that got replaced by 2 bruiser brothers. These guys were like the bruiser demons on the beastiary but harder, faster and meaner. I managed to autoshotgun them to death because the MIRV launcher did nothing against them, they just ignored the damage from it!

Map11 and 12 were quite easy in comparison. That ended my run, which to my surprise at the end, had no deaths in it at all!  Overall there were a lot of places where I could have died, the Bruiser Brothers Fight, the Nightmare Archvile in Map05, the Revenant horde in the earlier portion of that level, and more.  But I didn't die once, which was insane... I finally equalled my feat I did in Complex Doom last winter where I beat 32 slaughtermap levels without dying once in Complex Doom + LCA.


Thursday, November 16, 2017

Challenge Accepted! Doom Oblige wad maps 1-11 survived with only 1 Death! ONLY ONE DEATH!

So I decided to challenge myself in doom last sunday. This is what I did... I decided to try to beat maps 1-11 of a certain randomly generated mapset without dying once. I had done this on purpose for a specific reason. See along time ago on a doom channel which does not exist anymore, I did the same  thing, in an old scrapped version of the ultimate hell revealed pack's 4th episode. (Which was Alien Vendetta Difficulty to Hell Revealed 1 difficulty - depending on the maps). In complex Doom, I beat all 30 maps in that without dying.  I survived that mapset without dying once and I decided to see if I could do it AGAIN!

This time I was not successful... But I atleast only died once. I ran this challenge run in the mods DoomRPG and DoomRLA which are RPG mods for Classic Doom.  I ran through vdd2.wad maps1-11. They are quite hard. Huge hordes of enemies.  By map 4 I had fought 25 revenants in one room. Map 5 had 30 cacodemons in the map and 2-3 cacoabysses, which I had to use invulnerability (the skill) to get past. I died to an explosive barrel in map06. That was unfortunate. I accidentally hit one barrel which was next to a nuke barrel which can instakill you if you are anywhere close to it. I was, so I died. A complete Bullshit death because it was a fluke accident.  I got lucky and did not die at all past that point which was good. Beat maps 1-11 with only 1 death!

Here is the playlist for it if you want to see it. I recorded it for youtube for people to watch.   The maps were insanely hard this time. Huge hordes of minibosses all over the place in the last few maps. Just like Hell revealed or Alien Vendetta. my build was strong and that was part of the reason I survived. I had high vitality and high strength and high luck and most importantly, high defense. It saved me a ton. By high I mean 50+ in each stat. I was doing tons of damage and taking very little. The one death was a complete fluke. I didn't even notice the nuke barrel was even there till I looked back on my footage later.  My fate was sealed.


DoomRPG and DoomRLA are the best Doom Mods for a RPG Experience....

I've been looking for a Long, LONG time for a Doom mod to do Roleplaying game concepts well.. And after a long time, I have finally found the best doom mods to emulate RPG gameplay in Classic Doom, in Any mapset, with new enemies and weapons included...

Enter DoomRPG, Doom RL Arsenal and  RLME!

These three Classic Doom Mods turn your Doom game into an RPG, complete with levelups, stat points to spend, skills, a shield and many new features...I've been playing them nonstop for 16 straight days now.. and I can't get enough of them... My review of these mods gave them a really high score but I think I want to re-iterate why they are good here.

You get to levelup and pick stats to upgrade. But you also get skills to buy and use which is amazing. The last mods I found that let you do this all head  their own levels. This will work with ANY level! I've tried it with The Original Doom 2 maps plus some Randomly Genned ones as well. So Far it's not too buggy.. (See below for a clarification of that.) This mod set also has new guns and enemies in it and they are well designed..

You get 5 classes to play as.
 -The Marine is your minigunner and wastes less ammo as his perk.
-The Scout is your pistol expert and does 3x-8x damage with pistols depending on their fire rate.
-The Technician is your weapon modding expert. He can carry more mods than other classes.
-The Renegade is your shotgun expert. He shoots more pellets with shotguns.
-The Demolitionist is your explosives expert.. He takes NO Splash damage from his own
explosives.

As you kill enemies, two things will happen that do not happen in normal doom:
-They will drop Money
-You will get XP
When you levelup you get a certain amount of "Modules" that allow you to upgrade stats, buy skills, and do other things. Every thing you can do requires modules so It's important not to waste them.


The skills you get in this are critical to your survival. It's important to use them well and wisely. You only get so much energy and conserving that is important because it drains everytime you use a skill. Skills such as Healing, Summoning Marines or Enemies, Warping to the HQ Map,  Auras (buff spells in a more modern style) and Invulnerability are so useful in this.

Overall this makes doom 100x more fun! I am a huge RPG fan. Anyone who likes Classic Doom and RPG's should check this out...

As an added bonus, I am going to recommend these mods for Non RPG Fans for one reason... These mods make Doom Slaughtermaps EASY! Boost your strength to 116 and you can easily kill any enemy with any gun. Boost your vitality a lot and you can get your health to 1000+!  Boost your damage resistance to a high value and you take little damage. It's great for insane maps because of this. With default settings it's very hard to do, so make sure you increase "XP Multiplier" and "Levelup Modules Amount Factor"  (In DooMRPG Options) to their highest amounts before playing something like Hell Revealed in this. This tweak helps a ton!

With these tweaks on, I leveled up way quicker and was able to tank all my stats by level 6 of a wad. I was a walking tank. Unfortunately this makes the enemies levelup faster too so you have to scale back enemy level by setting  "Monster Random Min Multiplier" to 1.3, "Monster Random Max Multiplier" to 3.3 and then set "Monster Aura Curve" to -50 to reduce enemies with auras... Do this
and it should be fun. I did all of this and in my download all of this is done by default.

 Unfortunately the bugginess issues of these mods make it impossible to download them and expect the latest versions to work with eachother. See DoomRPG has gotten a lot more unstable with such features as Enemy scripting causing runaway script errors too much in the latest 0.10.1 version. I have a solution for people trying to get these mods to work with eachother, use my download which includes the less buggy 0.9.14 version of DoomRPG and includes all mods and files necessary to run it in one easily installed package. It should make this easier to run for people who have been stymied in trying to get these  three mods to run together.

There are other major issues with this mod but they have workarounds at least. The scripting done with existing enemies is a lot and can cause slowdowns in insane maps. It helps to set "Absolute Monster Limit" to 200 to get around this.

The mods are fun as hell and have some important features so binding keys is necessary. There are 20-30 more binds than in normal doom in this thing.  You will need to bind keys for lots of new features to run this properly. Luckily I already have done that for you! I have been playing this for a long time So I know all the keys by heart and use them...

Installation instructions.

Download this file and unzip all of it to your doom folder where Doom 2 is installed. Run Loadrpg.bat in your doom 2 folder to play.


I have included a very important help guide for new people to this mod. This guide will help you to survive it easier....


Hints:
DoomRPG+DoomRLA+RLME Hints

Keys:

W - move forward
S - Move Backward
A - Strafe left
D - strafe right
Alt - Jump
Left mouse button - fire
Right mouse button - altfire (some guns only)
Tab - Open player Menu
Z - Open buy/sell menu
x - drop current weapon
c - unequip current armor
[ and ] - select inventory items to use
Enter - Use selected  inventory item
E - Skill Wheel (Hold it down and use A and D keys at the same time to select a skill)
F1 - use Skill 1
F2 - Use Skill 2
F3 - Use Skill 3
F4 - Use Skill 4
F5 - Use Skill 5
F6 - Quick Save
F9 - Quick Load
R - Resurrect after death (Cheat)
1-9 - Select Weapons
G - Reload Weapon
Q - Quick Heal

In Player menu:
W - Up
S - Down
Space - go to the highlighted section
(Skills/Stats/Augmentations/Turret/Shield)
Escape - Exit Menu

In Skill Menu:
W - Up
S - Down
A - Left
D - right
Shift+A/D - Next/Previous Page
Space - Buy or Upgrade Selected Skill
E - Skill Wheel (After buying a skill hold this down and hit a or d to cycle through skill
slot to put your new skill in. I only use 4 to 5 skills... The number in each slot is it's
ID number. Hit the key (Use Skill 1) to activate skill with ID 1 for instance...
Escape - Go Back to player menu

In Stats Menu:
W - Up
S - Down
A - Left
D - right
Space - Upgrade selected stat...
Escape - Go Back to player menu


Read and memorize all these keys, especially the menu keys and skill keys! You will need
them!

Hints:

-You Pick a class before starting the game... Pick which one you want. It does not really matter
but some classes have some big advantages...

Marine
Advantage : Wastes less ammo
Scout
Advantage : Does 3x-8x damage with pistols
Technician
Advantage : Can carry more modpacks and can make modpacks from dropped weapons!
Renegade
Advantage : Fires more pellets with non automatic shotguns.
Demolitionist
Advantage : Receives no splash damage from his own rockets!

-Notice the numbers on the top of your screen... These are important.
The one that has a gun next to it is how many guns you are carrying. This can not go
higher than 6. Drop a gun by selecting a weapon and hitting the drop weapon key
to get free space to put another gun in if you have 6 guns...

The number with a cube on it is how many weapon mods you can carry. Before you can
pick up another mod and you have 4 already (or 8 if you are a technician) you need to use
one on a weapon to waste it before you can pick up another...

The one that has a armor vest on it is how many armor pieces you are carrying. This cannot go
higher than 3. To pick up armor if you have 3 armor pieces you need to sell armor peices
in the buy sell menu. Hit Z to go to the buy sell menu and hit SHIFT+A to get to the
armor section and hit the WSAD keys till you are hovering over an armor that has
a green number hovering over it and hit shift+Space to sell this one. Keep repeating
that till you sell enough armor pieces.


-Armor pieces.
Once you find armor it does not get automatically used like in normal doom. You have
to hit [ or ] to select an inventory item and hit Enter to use the armor from your inventory.
If you want to grab armor but cannot you need to hit remove armor (c key) to remove
your currently equiped armor before you can use a new piece of armor.

-Modding Weapons.
There are 4 major kinds of weapon mods in the game. To mod a weapon select the weapon
then select the mod from your inventory and hit enter to use that mod on the weapon.
Power mods - Red color - these increase weapon damage
Technical Mods - Orange Color Non Striped. - These increase switch speed of weapons
Agility Mods - Green - These mods increase weapon accuracy
Bulk Mods - Blue - These increase weapon clip sizes.
It's best not to waste mods for anything though thanks to the next feature...
There are other weapon mod types and those are used for the following features only

-Assemblies
If you use multiple specific types of weapons mods on a specific weapon you can turn
it into a new gun! It will ask you to confirm whether you want to do this, make sure
to hit fire (left mouse) to do that... You need specific weapons and specific weapon
mods to make new guns. here are some formulas I figured out about to help you..

Automatic Shotgun -
Take a combat shotgun (not the normal doom shotgun) and apply a power mod and then
a technical mod to it to make the automatic shotgun. this one is a must... Others are optional.
High Powered Plasma Gun -
Take a plasma rifle and apply a bulk mod then a power mod to it to make the high
powered plasma gun.
Megaton Shotgun -
Take a super shotgun (the doom64 double barreled shotgun) and apply
thre bulk mods and a firestorm mod to it to make the megaton shotgun. you may need to buy
the final mod because it's hard to get.
Infusion launcher -
Take a rocket launcher and apply a technical mod, then an agility mod,
then a power mod then another technical mod to it to make this overpowered plasma explosion
launching Rocket Launcher. Don't use this unless you are either far away from your enemies
or are the demolitionist.


-Skills and Leveling...
As you kill enemies you will levelup. You get modules which are the objects you need
to consume to buy skills, stat points, and other things in the mods.
Make sure to upgrade all your stats or else you will be ripped to shreds.
Important stats are:
Strength - Makes you do more damage with weapons
Vitality - Effects your max health
Energy - Determines how much energy you have to use skills. Make sure you get this to 300-400
asap so you can use Heal at level 2 ASAP!
Defense - Reduces how much damage you take.
Luck - Determines how good the guns you get from enemies are...
Get these stats to high (75-100) levels and you will be a walking god

Now skills are also important. You cannot survive these mods without Skills.
There are lots of skills you can use. Here are the different types:

Healing - Heals you or friendlies.
Auras - Magical stat boosts and powers
Utility - Misc Crap
Summons - Allows you to summon enemies or marines to fight for you.
Offensive spells - Allows you to shoot projectiles at enemies.

To select a skill and use it is complicated though. Do the following.
-Go to the skills page in your player menu
-Hit Shift+A/D to navigate the pages in the skill menu to find the page the skill
you want to use is on.
-Select the skill you want with the WSAD keys...
-Hit space to buy it with modules or upgrade it to it's next level.
-Hold down  E and Hit A and D to select a slot to put it in. Make sure to put it in a slot
no higher than 5!
-Leave the menus by hitting ESC twice.
-Remember the number of the slot.
-Hit E Again.
-Use one of the Use Skill 1-5 Keys (F1-F5) To use the skill.
This wastes energy when you do this. Energy Regenerates slowly.

Important Skills:
Heal - Heals you fully. At level 2 it heals status effects making this this the most
usefull skill.
Invulnerability - Makes you invulnerable for 30 seconds.
Transport - Makes you go to the HQ map... Use this at the beginning of levels only!
Red Aura - Makes you do more damage for 30 seconds.
Summon Cyberdemon - A hard one to get and use but it's worth it!

Quick Heal-
Your in a bind and need immediate health. If you have medikits stored away in your inventory
use the quick heal key to fully heal you by 50 points... It's Q by default.

Status effects-
Status effects are like diseases. They afflict you when you take damage sometimes. They include
blindness,Confusion,Fatigue and many more.
Blindness - Makes you go blind for a certain amount of time.
Confusion - Makes your screen get blurry for a certain amount of time.
Fatigue - Makes you move slower  for a certain amount of time.
These are annoying so it's best to heal them with the heal skill at level 2...

Buying and Selling-
Hit the z key to go to the buy/sell menu. Hit Shift+A/D to go from page to Page.
Hit WSAD keys to select an item to buy. Hit space to buy it and hit Shift+Space
to sell it if you have it already. You can buy lots of different things but ammo
is the most usefull of these. You will run out of ammo a lot in this mod so
buying ammo only is what I do. Note that buying good weapons is not possible till
you get a really high rank.

The HQ Map -
At the HQ map you can get healed fully (in the right room), Buy items (in the left room)
Fight in the arena (In the back left room), and take on missions (in the left area
of the starting room)... For the intents of this hint guide I will only mention
missions though, for the others are pretty much self explantory.

Missions -
Talk to the marine behind the desk in the first room to start a mission. You need to be rank
2 (Private) to do this. Kill enemies till you rank up if you are not rank 2 yet. There
are lots of different types of missions for different ranks. Higher ranks unlock
more difficult missions. There are 6 types of missions.
Collection - Collect items for money/Modules and an item of choice.
Kill - Kill certain amount of certain enemies for money/Modules and an item of choice.
Kill Auras - Kill a certain amount of enemies with auras on them for
money/modules and an item of choice.
Kill Reinforcements - Kill enemies as they teleport in during the level until they stop
to get money/Modules and an item of choice.
There are two other kinds of missions but I don't know how they work yet.
Pick a mission, hit spacebar to do it and the enemies/items you need to kill/collect
will spawn in the next level you go to.. Good luck.
To actually do a mission you must step inside the level teleport and hit W or S to select
a level and hit space to go to it. Then when you go to the next level, teleport back
using the "teleport" skill to go back to the HQ to get another mission!

Random Events-
Make sure to SAVE before exiting a level in this mod. Random events sometime happen
at the beginning of a level. Most are quite hardcore and can easily kill you. I choose to savescum
around them. Load your save if a message saying "Armageddon Event", "Vicious Downpour", "Power outage" or other things pops up at the beginning of a level. Reload your save to re-start
the next level without the event showing up....

Tuesday, July 18, 2017

The Ultimate Hell Revealed Pack gets totally Revamped...


I've been working hard over the last 2 days, working on revamped versions of the hell revealed pack wads.... Due to this, the originals were scrapped and never released. I had issues running the hell revealed pack wads in scoredoom, and due to this the new ones were created using a batch file system to generate megawads from randomly generated mapsets...  The old ones were built from scratch using zip files containing new enemies and textures, and were renamed to .wad files after the randomly generated mapsets were loaded into the zips...

The ultimate hell revealed pack is a randomly generated set of Hell Revealed Tribute wads I have been working on for a few months.... I am a huge fan of slaughtermaps for doom 2 and I play tandomly genned ones in Scoredoom quite often.... I made these because hell revealed to me is the first true slaughtermap megawad made for doom games and a pioneer of the gameplay style that so far has only been seen in doom games...

The new system has some advantages. The big one is scoredoom compatibility. Other advantages is that the wads are no longer zdoom only.... The disadvantages are minor, only 1 theme per wad rather than 3 now... That's a minor issue at best...

The new wads are made and I am working on testing them to see if they are hard enough for me... That's all I care about. Don't want these to be easy... In map1-11 tests of the new hr4,5 and hr666 that I did today, they were quite difficult, with me dying quite often in them, even on easy. That's more of a sign of my lack of competence at doom than a sign they are too hard (I suck at maps like these, I just like to play them, don't ask why)...

Here are some screenshots I took during my tests...

HR4 Revamp:


 Hr5 Revamp:


Hr666 Revamp:


I will keep on testing these new wads over the next few months While I have time... When I get past the first 11 map of each wad, the scoredoom portion of the test begins, where I play map12-30 in scoredoom to see if it runs well.... If it fails I run the first map that screws up in normal doom...

More info will come later people...